Succinctly put, ...when I light a stove, the last thing I want is an adventure.
I get that. I'm doing this for my own personal "stove fun" and, hopefully, as an "informational" (if long-winded and anything but "succinct") resource.
So, as noted in the post above more-or-less tangentially: I went out Monday morning to "cook my water" for breakfast and coffee, as well as conduct a short tangential experiment to remind myself how really overly-complicated the Muka stove I used earlier in the week and a few days before
actually is, and how other, much more stable and basic stoves compare.
Like others, I see that the Muka is a really nice engineering feat, and I like playing with it, but it's not a really good stove as far as reliability, ease of use and maintainability go. I don't think I'd ever actually use it to cook except at home because, if it
did fail, it would be useless, as well as far too difficult, if not impossible, to repair "in the field". I like how small, compact and light it is (11.5 oz for both stove and pump), but its cons are too serious.
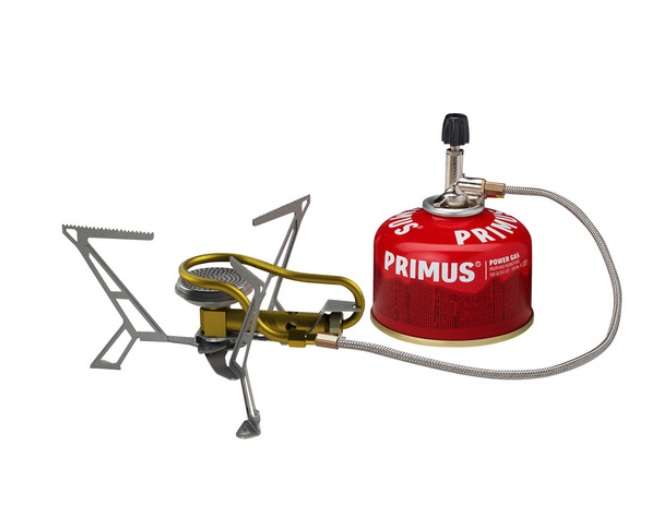
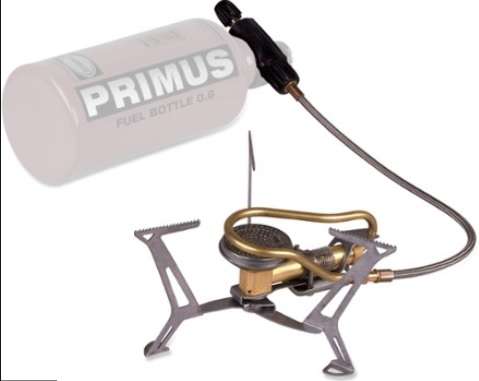
So, for comparison, I took my Primus Omnifuel and SVEA 123 out Monday morning to, well, basically look at the "comparative trouble" or "relative ease" with which they functioned in comparison with the Soto Muka and it’s advertised “no prime” feature.
Just for fun. (It was 36 degrees when I first went out, but, hey, it’s Texas, and that just won’t last here. We enjoy it while it lasts, 'cause it never lasts for long.)
The upshot is: I feel they are really simple in operation and setup cp. to the Muka.
(Surprise, surprise!) It's almost as if, while using these two stoves
simultaneously, I thought about what you had to do with the Muka to get the "no prime" business which is its main selling point, and then, with these two older stoves, it's just a matter of simply dashing a little alcohol - or releasing a bit of white gas - onto the stove's primer pan/disk, light it and let it warm the evaporator/burner bell of both. Meanwhile, you can walk away to do something else. When you come back, light the stove. If the primer is still burning a little, you don't even need a match or lighter. You have instant blue flame and a stable source of heat with little (relative) trouble at all (and a hell of a lot less pumping). If the primer has gone out, and you didn’t go away for more than a couple of minutes, a lighter or match and a twist of the valve results in the same steady blue flame, because the stove is still warm enough to vaporize white gas.
All my Mukas' fuel bottles are abraded on the bottom of the bottle (
even the new 400ml one I only used the once, Monday) because you have to pump and pump and pump (recommended 70-80 strokes for the 700ml bottle and 200+ for the 1L) to get that little (complicated, spring-loaded) "button pressure indicator" to reach the "red zone"** - I usually do this before connecting the stove for this very reason (to avoid some of the bottle abrasion) - and then, after attaching the stove (I usually get a quick spritz of white gas when the check valve in the connector is depressed while connecting, but this is at the point when the connector is almost against the o-ring, so no big deal), lighting and then the "non-priming-heating" cycle in “Start” (you have to chuckle – the burner assembly
still needs to be heated for a solid blue "Run" flame), most of that laboriously built-up pressure in the bottle is dissipated, so you have to (it's even in the instruction manual) "repump" to keep the flame nice and steady and blue after you move the valve from "Start" to "Run".
That's a lot of pumping, at least half of which is with the bottle connected to the running stove, so you have to maintain that relationship (of the internal fuel and air supply tubes) to the ground and gravity and fuel level while pumping the second time. And that results in fuel bottle abrasion that can’t be avoided. Plus, it's awkward as hell (for this old man), and it's a lot of pumping. (Did I mention that?) Ask yourself: “When was the last time I had to “repump” with my white gas stove?” I’m sure that only happened for anyone when they were actually cooking or doing something like melting snow – using the stove much longer than it takes to boil two to three cups of water. And, with most "prime stoves", there’s always plenty of reserve fuel in the fuel line to keep things going while you briefly “repump”. The Muka
needs that high pressure to work well, because fuel-air mixing occurs in the pump. The stove reverts back to a very poor “prime, then light” stove which doesn’t have the requisite priming mechanism (witness the sooty layer on the stove I got from my friends, who don't even have another stove, and are relative neophytes) if there’s no high pressure in the fuel bottle. (The same could be said of the Snowpeak WG, which was an earlier attempt to do much the same thing as the Muka. I think I've mentioned somewhere else on another thread about how difficult the WG is to light.)
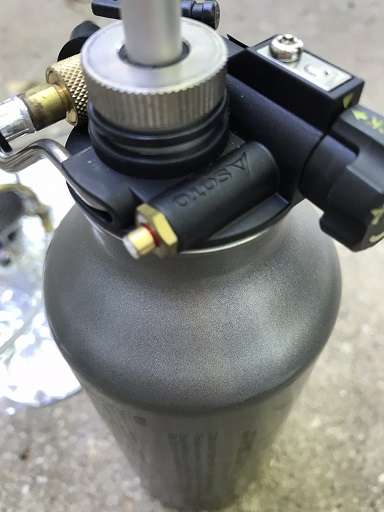
| **The "button pressure indicator" in the "red zone". (I apologize for the poor quality and lack of focus here.) |
|
| Notice that the "pressure indicator" here is facing 90 degrees away from the control valve(!!), which means you have to assure the correct setting and position (the control valve both turns and pulls out and pushes back in like an old-fashioned radio on/off switch) and "peek over" the fuel bottle a bit on the side of the fuel pump/bottle that's facing the stove. (The stove connector is in the photo and "in focus" on the upper left side of the picture, and the shiny silver bar you see just below it is the stand for the fuel pump/bottle assembly, which is, of course, on the bottom of the fuel bottle when it's attached to the stove and running, and on the opposite side from the control valve.) I tend to set up fuel bottles closer to me in relation to the stove for access to the control valve to adjust the flame. That means the stove is "over there" on the other side of the bottle, and that dictates this setup. I understand that the engineers had to arrange things to tap off the appropriate feed to get the pressure that is monitored by the "button", so I get it. Lots to deal with here, though that would (and does) get easier with use. |
In my earlier post, I mentioned the “dismantle/teardown review” I read, and said the guy doing that found 5 o-rings in the pump. I reread the post two nights ago and found I severely understated that –
it’s actually 10 o-rings in the pump. Read the article if you’re interested in the complicated pump assembly. I was awed by this guy’s skill and persistence in disassembling and then reassembling the stove.
You're right, it's beautifully made - but a total of 10 O-rings creates a lot of potential failure points in my opinion.
classiccampstoves.com/threads/soto-muka-pump-dismantled.34780/
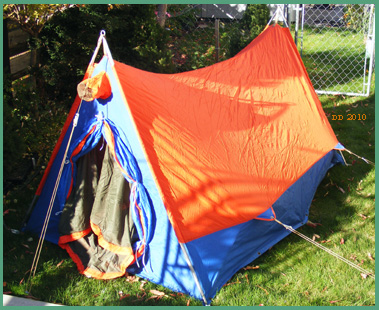
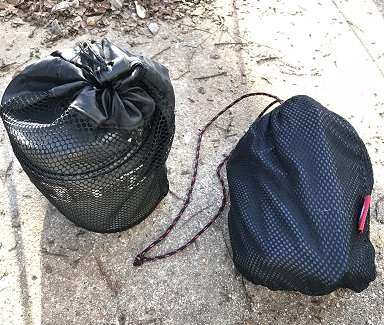
Here are the 2 stoves I used in their respective containers and bags.The SVEA 123 lives in the Primus Eta 1L heat exchanger pot on the left, which it fits perfectly. The original Primus Omnifuel bag is compact, even if the stove isn't really all that light.
The SVEA inside the Primus Eta 1L pot. I wrap a bandana around the stove in an attempt to prevent damage to the nonstick coating in the pot.
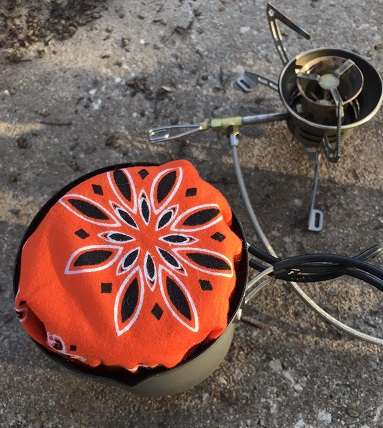
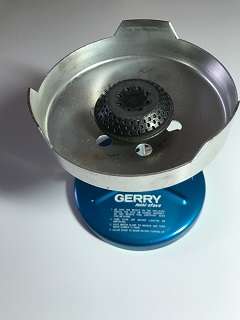
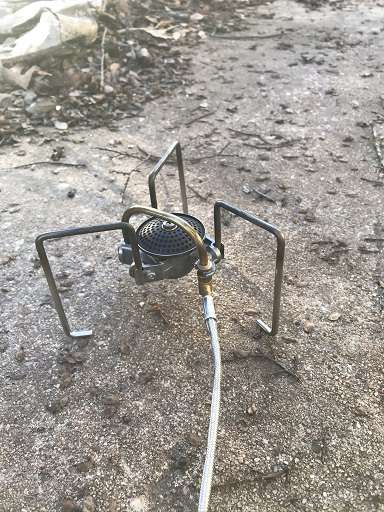
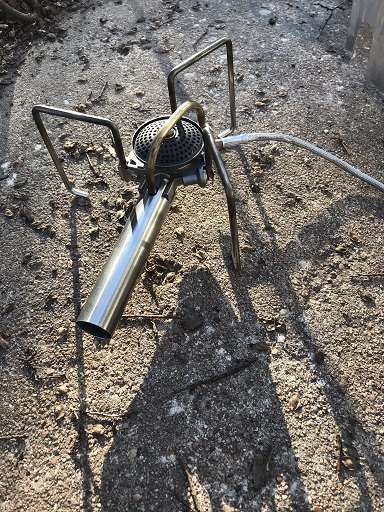
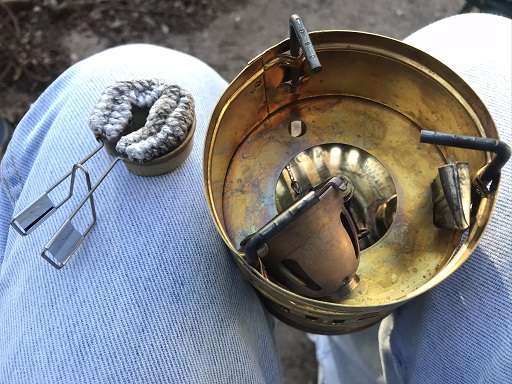
Here's the two stoves deployed and ready for use.I actually heated my 2-3 cups of water on the Primus on the right.

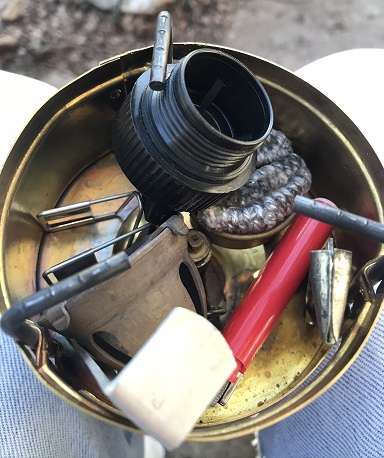
The stuff I store in the top of the SVEA 123, under its little cup lid. I have to take the bell off to get everything in, but I see this as a reason to check and clean the jet before each burn, so it's not a bad thing.
In here is 1) a spare BIC mini lighter (red plastic), 2) the cup handle (tucked into one of the slots in the bottom of the SVEA windscreen), 3) the jet cleaning needle in its holder (in the other slot that's above the filler cap, just next to the red mini BIC - the jet cleaning tool is shorter than the cup handle, so it fits here easily), 4) a fuel filler cap for easy filling from a fuel bottle (the SVEA only has a 4 oz capacity) and 5) a Tilley Lamp Lighter I use to prime the stove sometimes. I saw the Lamp Lighter in use on a video by "BernieDawg", and had to have one. It's much neater to use than simply pouring alcohol on the stove itself, but I'll still do that if I'm too preoccupied (or lazy) to get out the Tilley Lamp lighter. I used to carry a ferro rod in here w/ scraper, and it'd still fit, but I dropped it because I didn't really use it.
Here's a better picture of the Tilley Lamp Lighter, sitting on my left knee. When used, the SVEA windscreen must be off so that it can be placed clamped around the evaporator tube on the SVEA on the side away from the filler cap. Of course, that means that you have to put the windscreen back on the stove after it has been primed, and the bottom of the stove is quite warm with the stove running, and the windscreen has to be placed into the notches on the base and turned, so you are forced to grip the stove base fairly tightly. I haven't burned myself yet, but ... On Monday, I simply spritzed the alcohol onto the burner bell and into the priming depression. (
IOW, I was lazy.)
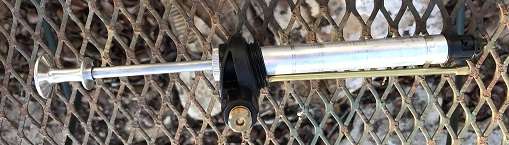
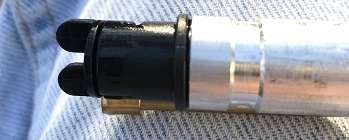
For comparison in the case of anyone who views the "Muka pump dismantle" review above, here's what the Primus pump looks like:
The Primus Omnifuel's ErgoPump, viewed from the fuel line connector side.
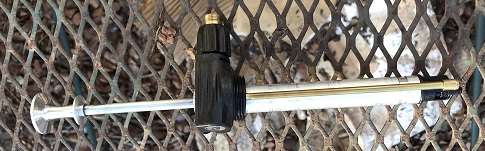
The ErgoPump viewed from the side along which the fuel pickup is located.
Note that the ErgoPump is designed to mount into the fuel bottle at an angle, so there's no need for fuel feed tubes that splay out to one side of the pump that you have to manipulate and turn in order to get the pump into the fuel bottle.
The pump's
leder pumpen dichtung (leather pump seal) on the pump main rod. It's very easy to remove and check the leather cup for wear and lubrication. Just unscrew the knurled "keeper" on the top of the pump rod below the generous pump handle and extract.
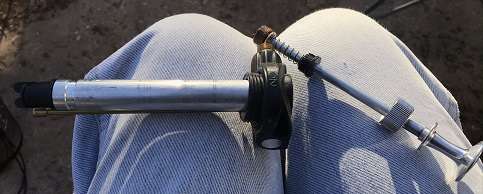
The no return check valve retainer's "Mickey Mouse" ears, which are used to twist the retainer out of the end of the pump.
The "no return" check valve retainer and spring removed from the end of the pump body below. It's a simple matter of press, twist and pull. (But there's more to this story than that.)
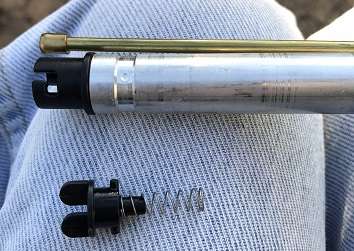
The spring you see here on my left knee attached to the "Mickey Mouse" retainer leapt away dramatically when I simply twitched a bit after taking this picture. This is a lesson (or two) on the relative complexity of the two stove pumps, and how just about
any level of complexity can be, well, "disastrous".
How many springs do you see in this picture from the "dismantle review" of the Muka pump? Yikes!!!
(You can click for a larger version. On Firefox, this means "right click and select 'View Image', then press the 'middle button' on your mouse for a separate tab, or just 'left click' - but then you'll have to use the 'back' button on your browser to get back to the thread. This is likely different on every browser.)
 So, "the story of the lost spring".
After the spring leapt off my knee, I carefully looked around the chair in which I was sitting in order to avoid stepping on the tiny spring. There was debris all around, it was early morning (9 AM or so), and I didn't see it, even though I'd seen it and tracked it as it fell. So I moved. I dropped to my knees while carefully avoiding putting my feet anywhere other than where they originally rested, then slowly turned and looked all about. Nothing. No sign. So I rose up again and carefully stepped away from the area I was sitting, onto the ground away from the concrete patio and chair, knowing all the time that the troublesome spring could have bounded and rolled over there just as well. I looked and looked to no avail. I could get another spring at home. I have multiple Primus stove and pump service kits. But, should this happen anywhere else, that's it. No stove. The check valve at the tip of the pump is absolutely necessary in order to keep air you've pumped into the fuel bottle in there and keep it from going back out from whence it was pumped. I looked and stared some more. Then I carefully reached over and patted the debris and a square meter of the concrete around the chair in which I was sitting when the spring "leapt".
Okay, at this point I very nearly gave up and decided to just get the spring out of the $15 service kit (rendering it incomplete and essentially unusable).
But I thought about what we all say about such situations, esp. after getting lost yourself in the woods: "don't panic; stop and think". So I carefully reached over to the metal table on which I'd sat my bowl of breakfast oatmeal with yogurt and fruit and proceeded to eat while squatting off the patio. When I finished eating, I really wanted a taste of coffee, but the mug was on the
other table, a good yard (or meter) away. Unreachable. So I looked and searched again. Bingo! There it was, directly under the chair where I had been sitting, in a small heap of cedar elm debris.
Why did I find it? How did I find it?
The intervening minutes (maybe 30 or so) meant the sun rose a bit. I didn't see the spring, but now its elongated shadow was clearer than earlier, and it really stood out.
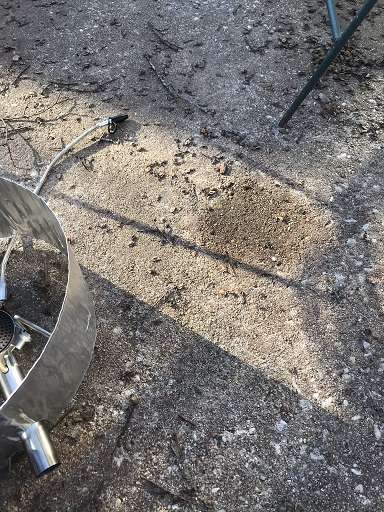
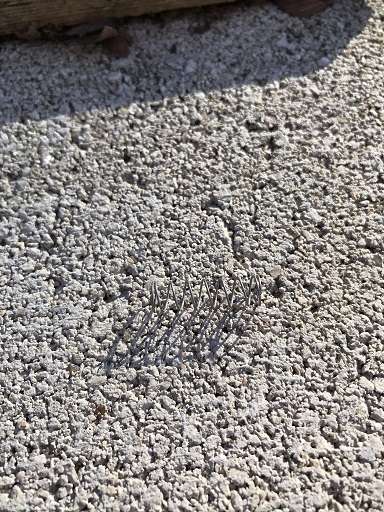
The troublesome spring from the end of the pump. Note that what really shows up in this picture is the
shadow of the spring, not the spring itself. Therein lies a woeful tale of loss and recovery.
3289 Primus Omnifuel Manual
cdn.shopify.com/s/files/1/1131/8622/files/3289_OmniFuel_51117_6.pdfHikin’ Jim’s review of the Muka, in which he comes (much more succinctly) to the same conclusion, though without my additional revelations (grandiose, ain't I?) about
any level of complexity being potentially fatal.
seattlebackpackersmagazine.com/the-soto-muka-stove-review/